Sean Bagshaw Outdoor Exposure Photography

Images from the edge

See all image results...

Search Criteria
Exact matches only
Search in title
Search in content
Content Type
Select all
Search Posts
Search Prints & Stock Photos
Search Events
Search Pages
  • About
    • Sean’s Biography
    • A Look Through My Lens
    • Social Media
    • Alliances
    • Sign Up For My Newsletter
    • Website Tour
    • Interviews And Podcasts
    • CV
  • Tutorials & TK Photoshop Plugins
  • Learn Nature Photography
  • Videos From My YouTube Channel
  • Signed Prints
    • Favorites Of 2023
    • OREGON
    • CANYONS AND RIVERS
    • CITYSCAPES
    • COASTAL
    • DESERTS AND PRAIRIES
    • FLOWERS AND PLANTS
    • FORESTS AND TREES
    • MOUNTAINS AND LAKES
    • NATIONAL PARKS
    • STREAMS AND WATERFALLS
  • PRINT OPTIONS
  • Stock Photography
    • OREGON
    • NORTH AMERICA
    • THE REST OF THE WORLD
    • AGRICULTURE AND VINEYARD
    • BUILT BY PEOPLE
    • NATURAL BEAUTY
    • OUTDOOR AND ADVENTURE
  • Books & Calendars
    • Calendars
    • Washington Evergreen
    • Oregon, My Oregon
    • Photographing Through The Seasons
  • Workshops
  • Events
  • Photography Blog
  • Contact
  •  

Out of Acadia Landscape Photography Conference

January 23, 2020 by Jennifer Bagshaw

Out-of-Acadia-2021

Register Now

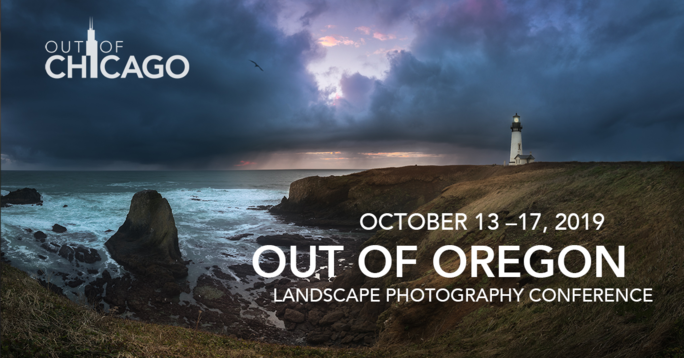
I’m thrilled to be back working with the ‘Out of Chicago’ crew in 2021. I’ll be teaching alongside many of my favorite photographers at the Out of Acadia Landscape Photography Conference. Out of Chicago’s Landscape Photography Conferences combine passionate photographers with the best possible instructors, amazing locations and great itineraries to provide a fantastic photography learning experience. It takes place in Bar Harbor Maine from October 10-14th, 2021. I hope you can join us.


Highlights include: 

  • Enjoy small group, in-the-field, photography teaching excursions.
  • Explore and capture – epic coastlines, waves, rocks, potential sea life and more  – with world-class instructors.
  • Experience hands-on classes, group critique and post-processing help.
For more information, visit www.outofchicago.com/acadia

When you register for Out of Chicago LIVE!, you can also receive $250 off  Out of Acadia and other upcoming Out of Chicago conferences.


Tagged With: digital photography, group criti, hand on help, hands on workshop, out of acadia, out of chicago, photography excursions, post processing help

Sean speaks at IrishLight Landscape Photography Festival in Dublin, Ireland

April 4, 2019 by Sean Bagshaw

Registration and more information

“IRISHLIGHT is a landscape photography festival with a range of events that we hope will help to inspire and educate the landscape community in Ireland and abroad.

The festival is run by Peter Gordon and Jelena Derk as a forum to pull the best professional Irish based landscape photographers together, bring international photographers to Ireland while also mobilizing the amazing enthusiast talent that exists both here and abroad.”

Presenters this year include Marc Adamus, Joel Tjintjelaar and Paul Sanders.

Sean will be speaking on October 6th at The Royal Marine Hotel in  Dun Laoghaire, Dublin, Ireland.


Tagged With: digital photography, digital workflow, fine art photography, landscape photography, light, nature photography, outdoor photography, photography technique, sean bagshaw photography

Sean to Present at The 2019 New England Camera Club Council Annual Photography Conference in Amherst, Massachusetts

March 6, 2019 by Jennifer Bagshaw

Learn it, Shoot it, Edit it! Sean will be a presenter at this year’s New England Camer Club Council annual conference in Amherst, Massachusetts, July 12, 12 and 14. In addition to numerous great presentations and workshops, the conference features image reviews and critiques, photo walks and lots of hands-on opportunities. Join Sean and other professionals in the classroom and the field in Amherst, Massachusetts this summer!

Tagged With: digital photography, digital photography workshop, fine art photography, landscape photography, lightroom, techniques, tk panel, workflow

Out of Oregon Landscape Photography Conference

December 17, 2018 by Sean Bagshaw

I’m looking forward to being part of Out of Oregon – Out of Chicago’s 3rd Annual Landscape Photography Conference, taking place on the Oregon Coast!

I am thrilled to be one of the instructors alongside several of my personal photography heroes and I would love for you to join me!

Out of Chicago’s 3rd Annual Landscape Photography Conference combines passionate photographers with the best possible instructors, amazing locations and great itineraries to provide a fantastic photography learning experience.

Highlights include: 

  • Enjoy small group, in-the-field, photography teaching excursions on the Oregon Coast.
  • Explore and capture – epic coastlines, waves, rocks and lighthouses, rainforests, sea life and more  – with world-class instructors.
  • Experience hands-on classes, group critique and post-processing help

More information at www.outofchicago.com/oregon

Tagged With: digital photography, group critique, hands on workshop, out of oregon, photography excursions, post processing help

Sizing Images Made Easy (Easier?) On The PhotoCascadia Blog

September 14, 2011 by Sean Bagshaw Leave a Comment

Sizing images for screen and print output may be one of the most confusing and misunderstood concepts in digital photography, which is deceiving because it appears pretty basic on the surface. Even after more than a decade of moderately hardcore Photoshop use I still find new ways to confound myself in this area. This topic is steeped in misunderstanding, urban legend, faulty logic and general confusion. Screen resolution vs. print resolution? What is the correct resolution for the web? To resample or not to resample? How much can I enlarge an image for printing? Why shouldn’t I upload a bunch of full resolution 21 megapixel images to Facebook or email them to grandma?

I have published an article on the Photo Cascadia Blog that I hope will help clear things up a bit and allow folks to get a firm grasp on exactly how best to size images for different purposes. However, if you are a recreational photographer who isn’t concerned with optimal image output, you should maintain your blissful state of mind and avoid reading this article at all cost.

If you are already involved in using Photoshop or other photo processing applications to size your images then it could be a worthwhile read. You might be interested to know that screen images don’t need to be 72 ppi (pixels per inch) and that, in fact, ppi resolution doesn’t have any affect on how images appear on the screen? And what about always printing at a certain resolution such as 300 or 360 ppi? The reality is that resolutions as low as 180 ppi can produce prints that look the just as good to the eye as higher resolutions and sometimes even better. Check out the article to learn more and find out my personal guidelines and workflow tips for sizing images.

Filed Under: Digital Image Editing Tips Tagged With: digital photography, Digital Photography Tips, digital workflow, Photoshop techniques

New Article On PhotoCascadia: Canon 5D Mark II ISO Noise

May 13, 2011 by Sean Bagshaw Leave a Comment

I have a new article on the Photo Cascadia blog detailing testing I did on ISO noise performance in the Canon EOS 5D Mark II. Out of all the technological advances in digital cameras in recent years I feel that lower image noise at higher ISO settings has had the largest positive impact on my photography. It is amazing to be able to shoot hand held at small apertures or in low light and also to capture night sky images without star trails and produce images that are not destroyed by noise.

It turns out that there is more to the ISO/image noise story than I suspected. Even as cameras improved I assumed that regardless of how good the ISO performance was that lower ISO settings would always produce lower levels of image noise. Noise tests with the Canon EOS 7D that were posted on the web by Tony Loentzen changed that logic. His tests showed that the 7D actually produced cleaner images at some higher ISO settings. For example, he found that ISO 640 produced almost as little noise as ISO 100!

Curious to find out if the Canon 5D Mark II behaved in a similar way I decided to conduct my own test. To see my test images and find out what I discovered you can read my article on PhotoCascadia.com. I’d love to hear your thoughts, questions and feedback.

Filed Under: Digital Photography Tips, Photography Equipment Tagged With: camera testing, Canon EOS 5D Mark II, digital photography, photography technique

Image Developing Workshop Review

April 15, 2011 by Sean Bagshaw 2 Comments

Steve Cole, a photographer based in Washington, recently attended two of my digital image developing classes in Bend, Oregon. Steve is serious about photography and has spent a lot of time researching techniques and developing his skills. He drove to Bend from Seattle hoping that he could add some new techniques and skills to his repertoire.

Steve, it turns out, is also a very good writer. After the class he was motivated to pen a detailed review of the classes. His description of what goes on during the class and what content was covered is better than I could do myself. For a well written, unsolicited overview of what we were up to in Bend I encourage you to give Steve’s article a read.

Here is a short excerpt. “So were the two classes worth it? Without hesitation, I can say YES. From the minute you first meet him, Sean is friendly and engaging without any elitism or arrogance. He is just a guy who is passionate about nature and photography and who doesn’t love that? Before becoming a “pro” photographer 8 years ago, Sean was a middle school teacher and that really shows in his ability to teach and explain concepts.”

As Steve says in the article, I haven’t yet scheduled these classes again in the near future. If you have a venue and a group of 10 to 15 people who are interested give me a call.

Steve’s Blog: scolephoto.blogspot.com

Steve’s Website: www.scolephoto.com

Filed Under: Photography Journal Tagged With: digital photography, digital workflow, Exposure Blending, nature photography, photography workshop

Digital Image Processing Video Tutorials

March 2, 2011 by Sean Bagshaw 5 Comments

Digital Image Processing Video Tutorials

Digital cameras and image processing have revolutionized photography. There was a time when photographers had a holistic view of photography, mastering both the technical skills with a camera and the artistic skills in the darkroom to develop and process their images to perfection. Embracing the two sides of photography, capture and processing, allowed them to showcase their personal vision in their images. The advent of 35mm color slide film photography shifted the focus away from processing and placed greater emphasis on camera technique, with certain limitations. While camera technique is as important as it ever was, digital image processing has provided a path for photographers to get back in the “darkroom” and regain the creative control of developing and processing images.

In three separate video tutorial series I share knowledge, philosophy, guiding workflow and specific techniques that I use to process and develop my photographs.

Photoshop Basics For Nature Photographers Price: $39.99
Add to CartView Cart

New to Photoshop? Learn to apply Photoshop to your outdoor, landscape & nature photography including Bridge and Camera Raw, plus the basic layout, tools, palettes, adjustments and filters you need to know to get started processing your outdoor photographs using the power & precision of Photoshop CS.

This tutorial series is for Photoshop beginners or those who want to fill in gaps in their skills. Based in CS5, almost all of the content is also applicable to earlier versions of CS and Photoshop Elements.
Includes 23 video tutorials with over three and a half hours of content.

Digital Processing Workflow For Nature Photographers Pre: $44.99

Add to CartView Cart

This tutorial series helps you establish an organized, best practice, non-destructive workflow . The workflow progresses through image organization, raw processing, and non-destructive Photoshop techniques. Topics include image clean up, color and contrast, selections, adjustment layers, masks and soft proofing for print as well as creative processing techniques that I use.

These tutorials are based in Photoshop CS5 but most of the workflow is also applicable to earlier versions of CS and Photoshop Elements.

Includes 30 video tutorials with over four hours of content.

Processing For Extended DynamiRange Price: $44.99

Add to CartView Cart
These advanced tutorials provide instruction in powerful techniques that will help you overcome the limitations of cameras to properly record high dynamic range light. Techniques include raw processing, Photoshop adjustments, exposure blending and luminosity masking.
These tutorials do not teach how to use HDR software. The techniques are all based on Photoshop adjustments and layer masking techniques. Proficiency with Photoshop CS is essential. Not compatible with Photoshop Elements.
Includes 29 video tutorials with over four and a half hours of content.
Digital Workflow And Extending Dynamic Range Set Price $79.99 Add to CartView Cart
Get Digital Processing Workflow For Nature Photographers and Processing For Extended Dynamic Range together at a special price.

Tutorial Samples

Photoshop Basics

Processing Workflow

Extending Dynamic Range

Filed Under: Digital Image Editing Tips Tagged With: digital photography, Digital Photography Tips, Exposure Blending, fine art photography, intructional videos, photography technique

On Landscape Photography, Digital Image Developing and Artistic Expression

February 28, 2011 by Sean Bagshaw 4 Comments

On Landscape Photography, Digital Image Developing and Artistic Expression

One of the mindsets that guides my photography is that the human eye and the camera don’t experience the world in the same way. Photographs are more limited than human sight in many ways, but can also see in ways that we can not. It is my goal to understand what the camera sees so I can manipulate and coax it to capture a photograph that reconciles with my own view of the landscape. To some this goes against tradition. We have been conditioned to believe that a photograph portrays, or at least should portray, an accurate record of the world and we must accept what the camera gives us. In truth, the very act of taking a photograph significantly alters a scene from how we perceive it in any number of ways. I’m less interested in the literal and more interested in what I can communicate and create. Artists have always endeavored to express themselves, their experiences and their impressions through their medium. A camera is a tool to do just that, to paint an artistic vision of the world. I want to capture something that excites me and hopefully resonates with others. In a recent interview my friend, professional musician and fellow photographer, Chip Phillips said, “The main thing to make the [musical] performance successful is to stir up an emotional response in the listener, and the same is true with a photograph.”

Both the way that we capture and develop our images have entered a new and exciting phase. Early on I embraced the changes digital technology brought to the art form. The digital age has allowed photographers to overcome many shortcomings and limitations of cameras that have frustrated them from the beginning. The new tools of photography enable me to be more creative and to express my experiences and vision more fully than ever before. I will always be fan and a student of traditional landscape and nature photography, venturing into the land to work with the raw materials of light, form, color and texture. And while the photographic tools and techniques are evolving, the motivation and the thought processes of the nature photographer remain unchanged. If anything, I find that it is more important than ever to be on top of my game. It takes skill in traditional photography techniques as well as skill in digital developing to get my images to approach what I hope for them.

There are those who worry that digital photography has lowered the bar. I can say my experience has been just the opposite. All the principles of light and composition continue to apply and proper camera technique is still essential. In fact, the way that I work with the camera in the field these days is more involved and creative than it ever could have been with film. I shoot thinking several steps ahead to how I will want to develop the image later on. In just a few seconds I might capture a range of frames utilizing different exposures, apertures and focal points in order to collect all the visual information in the scene I’ll need to develop the finished piece. Learning how to think and work with so many variables while simultaneously pre-visualizing the future processing has been far more interesting and challenging than working within the confines of a single frame of film ever was. Far from being a shortcut or a creativity killer, digital photography allows us to express a new and exciting vision, not unlike the way film photography did when it was introduced over a century ago.

For further musings on the topics of photography, artistic expression and where current digital developing techniques come to bare I would point you toward Guy Tal’s recent article: Lie Like You Mean It.

There are so many great activities one can be involved in in life. For many of us, one of those activities is the magic of exploring the world with our cameras in hand, capturing moments and trying to make lasting memories of the scenes that impress upon us.

Links that might be of interest:

Upcoming image processing classes and outdoor photography workshops.

Instructional videos on fine art image processing.

In my photography I am aware that the human eye and the camera don’t see the world in the same way. Photographs are more limited than human sight in some ways, but can also see in other ways that we can not. Since its invention we have been conditioned to accept that photography portrays a “literal” record of the world. However, as an artist, I’m less interested in the literal and more interested in how I can communicate my own experience and personal artistic vision. Artists have always endeavored to express themselves, their experiences and their impressions through their medium. My challenge is to use the camera to do just that, to paint an artistic vision of the world as I see it. I strive to do it well enough that it resonates with others.

I am a fan of traditional landscape and nature photography. I derive great pleasure from venturing into the land and working with the raw materials of natural light, form, color and texture. The earth is my palette. But I also want to go beyond photography as a mere technical pursuit or objective record of natural history. In my photos I struggle to express something beyond a literal representation of the scene. Through the use of traditional photography techniques as well as careful digital developing I struggle to project my own human impressions, experiences and imagination. I hope that those who view my images are able to experience the same sense of adventure, mystery, drama, exploration and beauty that I do when I am out in the world.

Photography has entered a new and exciting era. Early on I embraced the changes digital technology brought to the art form. The digital age has allowed photographers to overcome many shortcomings and limitations of cameras that have frustrated them from the beginning. It is an exciting time to be a landscape artist. The new tools of photography enable me to be more creative and to express my experiences and vision more fully than ever before.

For those wondering if digital cameras have lowered the bar in photography, I can say my experience has been just the opposite. All the principles of light and composition continue to apply and proper camera technique is still essential. In fact, the way that I work with the camera in the field these days is more involved and creative than it ever was or could have been with film. I shoot thinking several steps ahead to how I will want to develop the image later on. In just a few seconds I might capture a range of frames utilizing different exposures, apertures and focal points in order to collect all the visual information in the scene I’ll need to develop the finished piece. Learning how to think and work with so many variables while simultaneously pre-visualizing the future processing has been far more interesting and challenging than working within the confines of a single frame of film ever was. Far from being a shortcut and creativity killer, digital photography allows us to express a new and exciting vision, not unlike the way film photography did when it was introduced over a century ago.

Filed Under: Photography Journal Tagged With: digital photography, digital workflow, fine art photography, landscape photography, oregon photographer

Exposure Blending Techniques In Landscape Photography

December 16, 2010 by Sean Bagshaw 7 Comments

Exposure Blending Techniques In Landscape Photography

I recently published an article on the Photo Cascadia blog discussing some of the basic exposure blending techniques I use. Exposure blending is the processing technique I get asked about more than any other, and this is the topic most requested in my digital image processing classes.

Greensprings Sunset

So, what is exposure blending? Simply put, it is a method of combining the best exposed portions of two or more exposures of a scene to maintain detail and balance in the brightest and darkest areas. Camera’s have serious limitations in their ability to “see” wide ranges of light. Scenes with a fairly narrow range of light can be captured in a single exposure. But in many dramatic natural light situations the range of light from the brightest areas, like a sunset sky, and the darkest areas, like a shadowed canyon in the foreground, are far outside the ability of film or digital sensor to record all at the same time. This is in contrast to our own eyesight which is able to see a very wide range of light.

For this reason, many of the dramatic light photos people try to take have sky that is completely overexposed or white and landscape that is completely underexposed or black. These images never live up to the way that the person taking the photo experienced the scene and often evoke the disclaimer, “it looked way better than this when I took it”. Since the invention of photography in the 19th century photographers have tried to compensate for this shortcoming. Traditional film photographers developed a long list of techniques, both in camera and through darkroom processing, to try to create images of high light range scenes that matched what they could see. Digital cameras and the ability to process images using computers have now given photographers the best options for dealing with this problem. It is possible to take multiple exposures of a scene in camera, exposing each image for a different part of the light range, and then combine the properly exposed portions of each into one final image. The product is a photograph that has light balance and shadow and highlight detail that more accurately expresses our vision. Photographs that would previously have been impossible are now possible, although not without some effort, skill and artistic vision.

Rowena Hills

There are automated software solutions, known as High Dynamic Range (HDR)software, that can blend multiple exposures automatically, making it possible for even the most amateur photographers to combine exposures and create high dynamic range images. The most current versions of Photoshop have HDR software built in. Other popular HDR software includes Photomatix, Nik HDR Efex Pro, and UnifiedColor HDR Expose. Currently, however, all the software solutions I have tried create quality issues for someone like myself whowants to create large fine art prints. They allow very minimal local control over the effects they create and often produce a very cartoonish or glowing look that may or may not be what is intended. Most problematic to me are the color shifts, low contrast and digital artifacts that can be introduced by HDR software. For these reasons almost all of my exposure blending is done using hand blending techniques with layer masks in Photoshop.

These techniques are an art form in their own right, taking years to master and greatly increasing the overall difficulty and level of skill required in the photographic process. The exciting part is that the creative control that darkroom masters such as Ansel Adams had, and that was largely lost in the era of color film, has now back in the hands of the photographer. Marc Adamus sums up the challenge and value of this approach eloquently on his website stating, “My process in the field today is more difficult, more complex and more creative than it ever was or could have been with film…to think about this all in the field and bring back the right exposures to fulfill my vision of the scene has taken considerably more practice than learning how to use a colored or graduated filter in the film days, and has also opened new creative avenues. Anyone who thinks of digital photography as a ‘crutch’ of sorts, simply does not understand these processes and the precision with which they must be executed in-camera as well as in processing.” Marc does such a good job communicating the ways that many contemporary photographers work that I would encourage you to read his entire artist statement if you have the time.

Deep Forest

If you are interested in learning more about the basic concepts and techniques behind exposure blending I would recommend reading my articles, Bracketing Exposures For Exposure Blending and The Basics Of Exposure Blending. I also offer classes on exposure blending as well as private instruction.

I’d love to hear your comments related to this topic. If you are an outdoor photographer, is this a technique that you use? What are your experiences with it? If you are not a photographer, what are your impressions such contemporary photography techniques? Please feel free to leave me a comment or share this article using the social media links below.

Filed Under: Photography Journal Tagged With: digital photography, Exposure Blending, photography technique

How Many Exposures To Bracket For Exposure Blending Or HDR?

September 8, 2010 by Sean Bagshaw Leave a Comment

As photographers we frequently struggle to overcome the limitations of our equipment in order to create the photographs we envision. One of the biggest limitations of traditional photography is the narrow dynamic range of light that can be contained in an image compared to what we see.

Techniques for blending exposures vary from simple to highly complex. They can be accomplished using skilled layer masking techniques in Photoshop. We also have the option to use one of a rapidly growing list of exposure blending programs commonly referred to as High Dynamic Range (HDR) software.

One of the most common questions I’m asked in classes and workshops on the topic of bracketing exposures for exposure blending and HDR imaging is, “how do you know how many exposures you need to bracket?”

The goal is to capture all the dynamic range tonal information in a scene in a series of exposures. The sequence of images below shows four exposures I took of a high dynamic range scene on the Columbia River. Having all the shadow and highlight information recorded in the various exposures allowed me to blend them using layer masks to create the final image. I could have also used one of many HDR applications to blend the exposure values.

To read the full article I wrote on the Photo Cascadia Blog go HERE.

In the first exposure I noticed that both the shadows and highlights extended beyond the ends of the histogram.
By underexposing a stop I was able to contain most of the highlights.
Underexposing two stops enabled me to retain detail in even the brightest highlights.
Finally I overexposed by two stops to get an exposure in which no shadow detail was clipped. I did take an exposure one stop over exposed but didn't end up using it in the final image.
After careful blending using layers masks I did some additional processing for color and contrast to arrive at the final image.

You can read the complete article on the PhotoCascadia.com blog.

Please leave a comment or question below.

Filed Under: Digital Image Editing Tips, Digital Photography Tips Tagged With: digital photography, Digital Photography Tips, digital workflow, Exposure Blending, HDR photography, photography technique

New Horizons In Photography With Better High ISO Performance

January 29, 2010 by Sean Bagshaw 6 Comments

New Horizons In Photography With Better High ISO Performance

Several months back I upgraded cameras from my trusty Canon EOS 5D to the newer model, the Canon EOS 5D Mark II. The Mark II boasted a range of new features that made it a worthwhile investment, including a larger and clearer LCD screen, a stronger and more weather proof build, easier to navigate menus, customizable settings, HD video, a sensor dust cleaning function as well as greater resolution (21 MP), updated processors and firmware and reportedly better image quality. Over time I have found that, really, just one feature of the newer camera has fundamentally changed the way I can take photos. That feature is the greatly improved performance at higher ISO settings.

Hand held at 1/40 second, f/9, ISO 500

ISO is the standard by which the sensitivity of film or a digital sensor is measured. Better sensitivity, lower noise and improved in-camera noise reduction at higher ISO settings are hallmarks of the latest generation of digital SLR cameras, and high ISO performance will surely continue to improve in the near future. I have always used Canon digital cameras by choice, but the most current high end digital SLRs from Nikon, Sony, Minolta and others all have much better high ISO performance than their predecessors.

Hand held at 1/100 second, f/8, ISO 320

I haven’t done quantitative tests to compare the high ISO performance of older DSLRs and current ones, but the improvements are so dramatic to be readily apparent with a simple inspection of the image files at 100%. There are plenty of independent testers out there who have done careful scientific comparisons if you want the raw data. My goal in this article is simply to share some images I have taken recently that either would have previously been impossible or would have required more equipment and more labor intensive techniques. Of course, you would need to see high resolution image files to get a complete understanding of the image quality, but for the purpose of this article I think these screen size images give you the main idea. I should also point out that in addition to improvements in ISO performance, improved noise reduction algorithms in software like Adobe Lightroom and Camera RAW, as well as improved image stabilization technology in lenses take some of the credit.

Hand held at 1/13 second, f/4.5, ISO 3200

How does better high ISO performance allow for new opportunities in photography? As the sensor becomes more sensitive to light as the ISO setting is increased, the camera is able to maintain faster shutter speeds in lower light conditions and still get a proper exposure. Essentially it means you can shoot in lower light situations or with smaller aperture settings without the need for a tripod. However, with past cameras the increased sensitivity to light at higher ISO settings came with an unacceptable trade off; increased image noise or digital grain. Until I acquired the Canon 5D Mark II, the higher ISO settings were generally useless to me. My images need to be very clean and sharp, so I would always shoot at the lowest ISO setting (ISO 100) to ensure adequate image quality. This almost always meant the need for a tripod to get a sharp image.

Hand held at 1/15 second, f/5.6, ISO 3200

Experimenting with the ISO capabilities of the 5D Mark II during my travels in Mexico this month have left me impressed and excited about the possibilities. I still use my tripod most of the time, but I find that in situations where a tripod is impractical, time prohibitive or creatively limiting I can often raise the ISO to between 200 and 500 to allow for fast enough shutter speeds for hand held shooting with a very slight loss in overall image quality. Images at these ISO settings are certainly good enough for publishing and even fine art printing. There are times when having the ability to photograph without a tripod is extremely freeing and allows for flexibility, mobility, spontaneity and creativity that wasn’t possible before.

Hand held at 1/20 sec, f/4, ISO 3200

What’s more, I have found that I can also hand hold my camera in minimal light situations, such as indoors or for night time city scenes, by increasing the ISO dramatically. I have increased the ISO to as much as 3200 and still been able to capture very usable images. A slight degree of noise in these images is acceptable to me for the fact that they would have been almost impossible to get otherwise. While I still return to the tripod if image quality is essential, it is exciting to be able to photograph people and other moving objects in low light conditions and not have them be blurred. Most of my night city photography does not include people because of the blurring of objects in motion with slow shutter speeds.  Being able to hand hold the camera and get sharp images of moving subjects indoors and at night opens a whole new world of possibilities.

Hand held at 1/30 second, f/4, ISO 3200

I’m sure the technology in ISO performance will continue to improve for some time. Within a couple of years there will be cameras that allow us to photograph in almost complete darkness with fast shutter speeds and produce noise free images. Until then it is exciting to know how good the ISO performance is right now, and that photographers have the ability to take photographs that were previously impossible or impractical.

Hand held at 1/15 second, f/7.1, ISO 500

If you found this article helpful, informative or otherwise useful, feel free to share it on the social media network of your choice using the handy links below. If you have anything to add, feel free to leave a comment. Thanks!

Hand held at 1/30 second, f/4, ISO 3200

New Photography Possibilities with high ISO Performance

Several months back I upgraded cameras from my trusty Canon EOS 5D to the newer model, the Canon EOS 5D Mark II. The Mark II boasted a range of new features that made it a worthwhile investment, including a larger and clearer LCD screen, a stronger and more weather proof build, easier to navigate menus, customizable settings, HD video, a sensor dust cleaning function as well as greater resolution (21 MP), updated processors and firmware and reportedly better image quality. Over time I have found that one specific attribute of the newer camera has had a bigger impact on the way I can take photographs than any other. That feature is the greatly improved performance at higher ISO settings.

I haven’t run any objective tests to make quantitative comparisons between older DSLRs and current ones, but there are plenty of independent testers out there who have if you want the raw data. My goal in this article is to share some images I have taken recently that either would have been previously impossible or would have required more equipment and more labor intensive techniques.

Better sensitivity, lower noise and improved in-camera noise reduction at higher ISO settings are hallmarks of the latest generation of digital SLR cameras, and high ISO performance will surely continue to improve in the near future. ISO is the standard by which the sensitivity of film or a digital sensor is measured. I have always used Canon digital cameras by choice, but the most current high end digital SLRs from Nikon, Sony, Minolta and others all have much better high ISO performance than their predecessors.

How does better high ISO performance allow for new opportunities in photography? As the sensor becomes more sensitive to light with increased ISO settings the camera is able to maintain faster shutter speeds in lower light conditions and still get a proper exposure. Essentially it means you can shoot in lower light situations or with smaller aperture settings, without a tripod, than at lower ISO settings. However, with past cameras the increased sensitivity to light at higher ISO settings came with an unacceptable trade off; increased image noise or digital grain. Until I acquired the Canon 5D Mark II, the higher ISO settings were generally useless to me. My images need to be very clean and sharp, so I would always shoot at the lowest ISO setting (ISO 100) to ensure adequate image quality. This almost always meant using a tripod.

Experimenting with the ISO capabilities of the 5D Mark II during my travels in Mexico this month have left me impressed and excited about the possibilities. I still use my tripod most of the time, but I find that in situations where a tripod is impractical, time prohibitive or creatively limiting I can often bump up the ISO to between 200 and 500 to allow for fast enough shutter speeds for hand held shooting with a very slight loss in overall image quality. Images at these ISO settings are certainly good enough for publishing and even fine art printing. In some situations the ability to photograph without a tripod can be very freeing and allow for creativity and camera positions that weren’t possible before.

What’s more, I have found that I can also hand hold my camera in very low light situations, such as indoors or with night time city scenes, by increasing the ISO dramatically. I have increased the ISO to as much as 3200 and still been able to capture very usable images. The value of these images in greatly enhanced by the fact that they would have been almost impossible to get otherwise. While I still return to the tripod if image quality is essential, it is exciting to be able to photograph people and other moving objects in low light conditions and not have them be blurred. Most of my night city photography does not include people because of the blurring of objects in motion. Being able to hand hold the camera and get sharp images of moving subjects in low light opens a whole new world of possibilities.

I’m sure the technology in ISO performance will continue to improve for some time. Within a couple of years there will be cameras that allow us to photograph by moonlight without a tripod and produce noise free images. Until then it is exciting to know that ISO performance is at a level right now that allows for types of shooting that were previously impossible or impractical.

Filed Under: Digital Photography Tips, Photography Equipment, Photography Travel Journal Tagged With: digital photography, Guanajuato, night photography, photography techniques, travel photography

Pacific Northwest Photography Podcast Interview

December 7, 2009 by Sean Bagshaw Leave a Comment

Pacific Northwest Photography Podcast Interview

Talented outdoor photographer, Adrian Klein, is now producing a great podcast called Pacific Northwest Photography. Adrian recently interviewed me for his podcast, which you can listen to on the player above. During our conversation we chatted about favorite locations, adventures and photography equipment. I also give the behind the scenes tales of the two images below. You can also get the complete story behind my intolerance of goat flavored food products.

I highly recommend checking out Adrian’s photography at www.adrianklein.com

and his photography blog at http://adriankleinphoto.blogspot.com/

On Adrian’s home page you can subscribe to his PNWP Podcast by clicking the red musical note.

Lunar Eclipse Over Mt. Shasta
Double Falls, Glacier National Park

Filed Under: Photography Journal Tagged With: digital photography, landscape photography, nature photography, northwest photography, oregon photographer, outdoor photography, photography interview, photography podcast, photography techniques, professional photographer, sean bagshaw, southern oregon photographer

Featured Photographer: Al Magnus

July 31, 2009 by Sean Bagshaw 2 Comments

Featured Photographer: Al Magnus

My photography has many sources of inspiration, and not all of them are standard nature photographers. I like to bring an element of fantasy to my images, but very few photographers do it as well as Al Magnus. His photo illustrations are the product of collecting images of various elements, sometime over the course of years, and then painstakingly merging them to create wondrous photo-illustrations. You can see more of Al Magnus’ work at www.almagnus.com

Les tâches solaires by Al Magnus

Filed Under: Featured Photographer Tagged With: Al Magnus, digital photography, fantasy photography, photo-illustration

Organizing The Digital Photography Workflow

January 23, 2009 by Sean Bagshaw 4 Comments

Organizing The Digital Photography Workflow

I recently had the opportunity to take an amazing one day workshop on digital photography workflow from Mac Holbert, co-founder of Nash Editions, widely known as the world’s first digital printmaking studio focusing solely on photography. Prior to Nash Editions, Mac Holbert was the Tour Manager for the music group Crosby, Stills & Nash. He co-founded Nash Editions with Graham Nash in 1987. If you aren’t familiar with Nash Editions or Mac Holbert I recommend reading this interview by John Paul Caponigro. John and Mac are both instructors with the Epson Print Academy.

Mac Holberts’s workshop revolutionized how I approach my workflow in Photoshop. While Mac knows and willingly shares a wide range of Photoshop actions, adjustments and techniques, it is his suggestions for how to organize and approach the digital photography workflow that I found most enlightening. As the saying goes, “give a man a fish and he eats for a day, teach a man to fish and he eats for life”. Mac refers to specific Photoshop techniques as the fish, but a well organized and purposeful work flow as knowing how to fish. He also points out that with a program as powerful as Photoshop, there are many ways to get to any single photoshop destination, but having a well organized workflow ensures that you don’t end up at the wrong destination, such as with damaged pixels or with workflow steps that can’t be reversed.

Mac emphasizes that the digital workflow should begin with adjustments that directly affect pixels (those not made on adjustment layers) and more global adjustments and then proceed toward more and more localized adjustments. He also suggests that your Photoshop layer stack be organized to reflect this progression.

A workflow following this type of progression might go something like this: start with adjustments that affect pixels, such as cloning, noise reduction and perspective adjustments. Then proceed to global tonal and color adjustments (made with curves adjustment layers) such as setting the black point, gray point, global contrast and global brightness. After those adjustments are made it is time to start targeting smaller regions of the image that need adjusting such as regional dodging and burning and targeted tone, saturation and contrast adjustments. Finally, the workflow is finished up with specific “spot” adjustments such as manual dodging and burning, tonal adjustments, midtone enhancement, local sharpening and so on.

Keeping the layer stack organized to reflect this progression is paramount. The following graphic is the one the Mac uses to give a basic illustration of what a well organized layer stack might look like.

My old workflow, largely self-taught, generally allowed me to achieve what I wanted with an image, but it was highly haphazard and disorganized, and I often worked myself into corners or created hard to resolve issues. I knew that there was a better, more efficient and less damaging approach. Mac’s suggetions were just what I was looking for. If you ever get the chance to attend one of Mac’s workshops, through the Epson Print Academy or elsewhere, I highly recommend it.

Filed Under: Digital Photography Tips Tagged With: best photography workflow, digital darkroom, digital photography, digital photography workflow organization, digital workflow, Epson Print Academy, John Paul Caponigro, Mac Holbert, Nash Editions, organizing your digital workflow, Photoshop techniques, Photoshop tips, sean bagshaw photography

Photo Tip: Blurry Trees

November 20, 2008 by Sean Bagshaw 2 Comments

Photo Tip: Blurry Trees


Much of my photography is of the greater landscape and I’m often trying to present sweeping vistas with sharp detail. However, I also like to photograph more intimate scenes and abstracts. One of my favorite abstract techniques is motion blur. This can be achieved a few different ways and is a particularly good technique for emphasizing leading lines in a photo while smoothing out distracting elements. The final result can often look more like a painting than a photograph.

I really like to use motion blur with trees that have staight trunks. The technique is more an art than a science, so a lot of experimentation and throw away images are required to get something that I like. I start by setting a relatively slow shutter speed and making a vertical pan (movement) with my camera. I have found that shutter speeds between 1/4 of a second and 1/20 of a second work best. I move the camera up or down, in as straight a line as possible and depress the shutter release as the camera is moving. At slower shutter speeds I pan slower and at faster shutter speeds I pan faster. It is hard to know exactly what will be in the frame so I repeat the process over and over so that I will have many images to select from. Panning the camera while it is on a tripod can help keep the motion steady and smooth, but also limits flexibility.

Physically panning the camera is often all I need to do to achieve the abstract look I’m going for. Other times I selectively add more blur by using the Motion Blur filter in Photoshop (Filter>Blur>Motion Blur). To do this I’ll create a duplicate layer of the background image and blur the duplicate. Then I’ll add a layer mask to the blurred layer and paint with a black brush on the mask to bring through any detail from the original image that I want to keep. This digital blurring technique can also be applied to images that were taken in focus without panning the camera. Digital blurring often takes just as much trial and error as panning the camera.

Several of my favorite photographers have used these techniques to create some wonderful abstract images, including Jesse Spear, Eddie Soloway and William Niel.

Filed Under: Digital Image Editing Tips, Featured Photo, Featured Photographer, Featured Photos Tagged With: camera panning, Digital Image Editing Tips, digital photography, Digital Photography Tips, Eddie Soloway, fine art photography, Jesse Spear, motion blur, nature photography, photography of trees, photography tip, Photoshop motion blur, shutter speed, William Niel

Longer Exposures For More Saturation and Luminosity

October 6, 2008 by Sean Bagshaw 1 Comment

Longer Exposures For More Saturation and Luminosity

Â

In situations involving low levels of light it can often be beneficial to obtain a longer exposure to allow the sensor/film more time to absorb color and glow. There can be a lot of color and light bouncing off clouds and hills that our eyes can’t pick up. Cameras are able to “see” into low light scenes by leaving the shutter open and collecting more light. If I really want to pull as much light and color from a scene as possible I’ll often use a neutral density filter (ND) along with my usual filter stack (polarizer and graduated neutral density when needed) and also set the ISO on my camera down to 50 in order to extend what was already going to be a long shutter speed.

A neutral density filter is a neutral gray piece of glass or plastic that is placed in front of the lens. Since it is neutral it doesn’t change the color of the image or do any other special effects. All it does is reduce the amount of light that can pass through the lens to the image sensor or film (kind of like wearing color neutral sunglasses). By reducing the amount of light coming in, the exposure time needs to be longer to get a properly exposed image. One effect of longer exposure times is the blurring of anything moving within the image (water, clouds, wind blown trees, etc.). Another affect is that if there is low level colored light washing over the scene it will saturate in the image over time. I use Singh-Ray neutral density filters because they are some of the most color neutral filters available and give excellent results. I also use Singh-Ray Graduated Neutral Density (GND) filters. GND filters are neutral gray at the top and fade to clear near the middle. They are used to hold back the light in one part of an image (like a bright sky) in order to balance the light across the scene.

The two photos above were taken one right after the other, the first at 6 sec @ f/20, ISO 100 with a 3 stop GND for the sky. The second was taken at 30 sec @ f/20, ISO 50 with a 3 stop GND and a 3 stop ND. Quite a difference 24 seconds of shutter time can make.

Filed Under: Digital Photography Tips, Photography Journal Tagged With: digital photography, exposure, filters, graduated neutral density, help, light, long exposure, neutral density filters, photography, pointers, saturation, singh-ray filters, techniques, tip, tips, tutorial

© 2026 · Sean Bagshaw Outdoor Exposure Photography