Sean Bagshaw Outdoor Exposure Photography

Images from the edge

See all image results...

Search Criteria
Exact matches only
Search in title
Search in content
Content Type
Select all
Search Posts
Search Prints & Stock Photos
Search Events
Search Pages
  • About
    • Sean’s Biography
    • A Look Through My Lens
    • Social Media
    • Alliances
    • Sign Up For My Newsletter
    • Website Tour
    • Interviews And Podcasts
    • CV
  • Tutorials & TK Photoshop Plugins
  • Learn Nature Photography
  • Videos From My YouTube Channel
  • Signed Prints
    • Favorites Of 2023
    • OREGON
    • CANYONS AND RIVERS
    • CITYSCAPES
    • COASTAL
    • DESERTS AND PRAIRIES
    • FLOWERS AND PLANTS
    • FORESTS AND TREES
    • MOUNTAINS AND LAKES
    • NATIONAL PARKS
    • STREAMS AND WATERFALLS
  • PRINT OPTIONS
  • Stock Photography
    • OREGON
    • NORTH AMERICA
    • THE REST OF THE WORLD
    • AGRICULTURE AND VINEYARD
    • BUILT BY PEOPLE
    • NATURAL BEAUTY
    • OUTDOOR AND ADVENTURE
  • Books & Calendars
    • Calendars
    • Washington Evergreen
    • Oregon, My Oregon
    • Photographing Through The Seasons
  • Workshops
  • Events
  • Photography Blog
  • Contact
  •  

Sean speaks at IrishLight Landscape Photography Festival in Dublin, Ireland

April 4, 2019 by Sean Bagshaw

Registration and more information

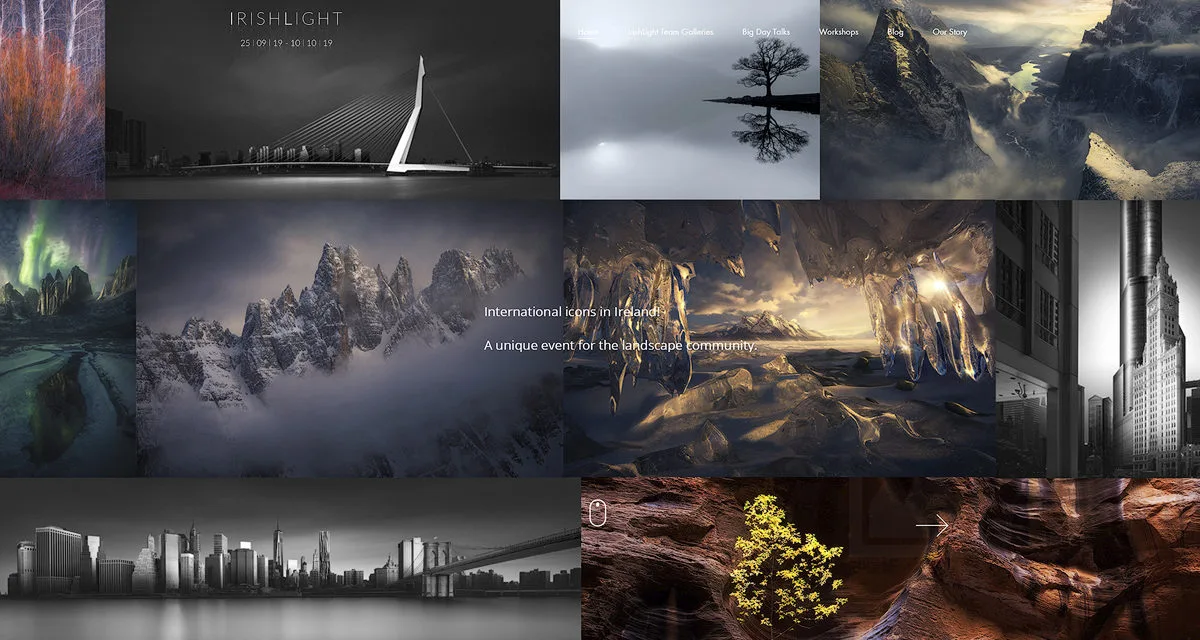
“IRISHLIGHT is a landscape photography festival with a range of events that we hope will help to inspire and educate the landscape community in Ireland and abroad.

The festival is run by Peter Gordon and Jelena Derk as a forum to pull the best professional Irish based landscape photographers together, bring international photographers to Ireland while also mobilizing the amazing enthusiast talent that exists both here and abroad.”

Presenters this year include Marc Adamus, Joel Tjintjelaar and Paul Sanders.

Sean will be speaking on October 6th at The Royal Marine Hotel in  Dun Laoghaire, Dublin, Ireland.


Tagged With: digital photography, digital workflow, fine art photography, landscape photography, light, nature photography, outdoor photography, photography technique, sean bagshaw photography

Anatomy Of A Sunrise

August 31, 2011 by Sean Bagshaw 8 Comments

Anatomy Of A Sunrise

Have you seen the time lapse twilight and night photography of Terje Sorgjerd? In his film, The Arctic Light, he shares a gorgeous high speed chronology of extended magical twilight hours he finds in the far reaches of Norway. In the spring sunsets and sunrises at this latitude can last for many hours.

Not counting people who live in such extreme latitudes as northern Norway, I don’t think we get frequent chances to carefully study a magnificent twilight sky show these days. Many of us aren’t awake and outside early enough in the morning to witness the sunrise. Much of our day in these modern times is spent indoors or within an urban landscape which significantly reduces how much time we spend viewing the sky. I have often noticed a faint warm glow coming through my east facing living room windows only to find I was missing a brilliant sunset in the sky to the west. Additionally, opportunities to linger in the twilight are commonly sacrificed to the pace of life, rushing from office to car with heads down or eating dinner while reading an iPad, sorting through junk mail and sending texts. Many of us can only remember a handful of times when chance and circumstance have enabled us to be in the right place at the right time to look up at the sky and be amazed.

As an outdoor photographer I have learned to revel in the light at the edges of day. I devote many mornings and evenings to searching for the conditions that will allow me to have an exhilarating sunrise or sunset experience just one more time. The process of photographing at the edges of day motivates me to watch with great interest and concentration. Some sky shows last for mere seconds, while others will linger for many minutes, colors changing and moving around the sky. I can only imagine witnessing a twilight that lasts for many hours, such as the ones Terje records in Norway.

Recently I came across a series of photographs I took during a spectacular sunrise in North Cascades National Park in Washington in the fall of 2010. It was one of those rare occasions in which the event played out over many minutes, allowing me to photograph it several times from slightly different vantage points. While I worked on each image individually I didn’t notice how, as a series, they illustrate the anatomy and progression of light, color and pattern in a way that is hard to share any other way.

This is how that morning unfolded. Chip Phillips, David Cobb and I had camped in a dense wood below Cascade Pass near Sahalie and Pelton peaks and the stunning Sahalie Arm trail. The night before we had been dismayed at the sight of a fallen climber’s body being lifted out of the mountains on the end of a rope beneath a rescue helicopter. It was still replaying in my dreams when Chip rose at 3:00 AM with the intent of hiking high above the pass before sunrise. David left camp second, about an hour later. I was last out of camp and wasn’t far up the trail when the sunrise light began to show itself.

Cursing myself for sleeping too long, I made this photograph along the trail still low in the valley in near darkness. The first light was just beginning to illuminate the clouds and the dark features of the land. A long 15 second exposure at f/13 and ISO 640 recorded the dim landscape much brighter than it appeared to the eye. A second exposure of just 4 seconds captured a good exposure for the sky and the properly exposed areas of each were blended together using layer masking techniques.

Aware that the best light would come rapidly and that I wasn’t in the ideal location, I ran up the trail, stumbling in the dark and breathing hard. The color intensified and I frantically searched for something to anchor the foreground of my next photo. I found a small mountain ash tree turning red with the coming autumn. At the same time I noticed the stream in the valley beginning to reflect the red-orange of the warming sky. Radiant light reflecting off the undulating under surface of the clouds back lit the foliage making it appear to be glowing from within. This wide angle, vertical composition turned out to be my favorite from that morning. I titled it Unforgettable Fire and it is now part of my print collection.

Satisfied that I had managed to take a good photo despite my late start I relaxed a bit. However, to my surprise, the color showed no signs of abating. I continued up the trail looking for other perspectives from which to photograph the scene. I scrambled around, struggling to find a composition as compelling as the last. While I didn’t find another that felt as good, I kept stopping to shoot because the color in the sky continued to spread and intensify, accentuating the shapes in the clouds. In this image the brilliant reds and oranges overpower the rest of the scene.

Further along my ascent of the pass the colors began to shift from deep reds to lighter oranges and yellows and cool light began to filter through the cloud layer from above.

Finally, as the day brightened, the sun rose above the cloud layer. The under-lighting faded along with the color, leaving the clouds flat and gray from below but giving a glimpse of blue sky and higher clouds above.

That morning, as well as many others, have become important and indelible parts of my consciousness. Through photography I have become better at being acutely present and attentive during such magical twilight events, making them that much richer, meaningful and memorable. Having the photographs as keepsakes gives me the opportunity to relive the experience and see it again in ways I wasn’t able to as I witnessed it.

Filed Under: Featured Photos, Photography Journal Tagged With: landscape photography, National Park Photography, photography technique, Twilight Photography

New Article On PhotoCascadia: Canon 5D Mark II ISO Noise

May 13, 2011 by Sean Bagshaw Leave a Comment

I have a new article on the Photo Cascadia blog detailing testing I did on ISO noise performance in the Canon EOS 5D Mark II. Out of all the technological advances in digital cameras in recent years I feel that lower image noise at higher ISO settings has had the largest positive impact on my photography. It is amazing to be able to shoot hand held at small apertures or in low light and also to capture night sky images without star trails and produce images that are not destroyed by noise.

It turns out that there is more to the ISO/image noise story than I suspected. Even as cameras improved I assumed that regardless of how good the ISO performance was that lower ISO settings would always produce lower levels of image noise. Noise tests with the Canon EOS 7D that were posted on the web by Tony Loentzen changed that logic. His tests showed that the 7D actually produced cleaner images at some higher ISO settings. For example, he found that ISO 640 produced almost as little noise as ISO 100!

Curious to find out if the Canon 5D Mark II behaved in a similar way I decided to conduct my own test. To see my test images and find out what I discovered you can read my article on PhotoCascadia.com. I’d love to hear your thoughts, questions and feedback.

Filed Under: Digital Photography Tips, Photography Equipment Tagged With: camera testing, Canon EOS 5D Mark II, digital photography, photography technique

Digital Image Processing Video Tutorials

March 2, 2011 by Sean Bagshaw 5 Comments

Digital Image Processing Video Tutorials

Digital cameras and image processing have revolutionized photography. There was a time when photographers had a holistic view of photography, mastering both the technical skills with a camera and the artistic skills in the darkroom to develop and process their images to perfection. Embracing the two sides of photography, capture and processing, allowed them to showcase their personal vision in their images. The advent of 35mm color slide film photography shifted the focus away from processing and placed greater emphasis on camera technique, with certain limitations. While camera technique is as important as it ever was, digital image processing has provided a path for photographers to get back in the “darkroom” and regain the creative control of developing and processing images.

In three separate video tutorial series I share knowledge, philosophy, guiding workflow and specific techniques that I use to process and develop my photographs.

Photoshop Basics For Nature Photographers Price: $39.99
Add to CartView Cart

New to Photoshop? Learn to apply Photoshop to your outdoor, landscape & nature photography including Bridge and Camera Raw, plus the basic layout, tools, palettes, adjustments and filters you need to know to get started processing your outdoor photographs using the power & precision of Photoshop CS.

This tutorial series is for Photoshop beginners or those who want to fill in gaps in their skills. Based in CS5, almost all of the content is also applicable to earlier versions of CS and Photoshop Elements.
Includes 23 video tutorials with over three and a half hours of content.

Digital Processing Workflow For Nature Photographers Pre: $44.99

Add to CartView Cart

This tutorial series helps you establish an organized, best practice, non-destructive workflow . The workflow progresses through image organization, raw processing, and non-destructive Photoshop techniques. Topics include image clean up, color and contrast, selections, adjustment layers, masks and soft proofing for print as well as creative processing techniques that I use.

These tutorials are based in Photoshop CS5 but most of the workflow is also applicable to earlier versions of CS and Photoshop Elements.

Includes 30 video tutorials with over four hours of content.

Processing For Extended DynamiRange Price: $44.99

Add to CartView Cart
These advanced tutorials provide instruction in powerful techniques that will help you overcome the limitations of cameras to properly record high dynamic range light. Techniques include raw processing, Photoshop adjustments, exposure blending and luminosity masking.
These tutorials do not teach how to use HDR software. The techniques are all based on Photoshop adjustments and layer masking techniques. Proficiency with Photoshop CS is essential. Not compatible with Photoshop Elements.
Includes 29 video tutorials with over four and a half hours of content.
Digital Workflow And Extending Dynamic Range Set Price $79.99 Add to CartView Cart
Get Digital Processing Workflow For Nature Photographers and Processing For Extended Dynamic Range together at a special price.

Tutorial Samples

Photoshop Basics

Processing Workflow

Extending Dynamic Range

Filed Under: Digital Image Editing Tips Tagged With: digital photography, Digital Photography Tips, Exposure Blending, fine art photography, intructional videos, photography technique

Exposure Blending Techniques In Landscape Photography

December 16, 2010 by Sean Bagshaw 7 Comments

Exposure Blending Techniques In Landscape Photography

I recently published an article on the Photo Cascadia blog discussing some of the basic exposure blending techniques I use. Exposure blending is the processing technique I get asked about more than any other, and this is the topic most requested in my digital image processing classes.

Greensprings Sunset

So, what is exposure blending? Simply put, it is a method of combining the best exposed portions of two or more exposures of a scene to maintain detail and balance in the brightest and darkest areas. Camera’s have serious limitations in their ability to “see” wide ranges of light. Scenes with a fairly narrow range of light can be captured in a single exposure. But in many dramatic natural light situations the range of light from the brightest areas, like a sunset sky, and the darkest areas, like a shadowed canyon in the foreground, are far outside the ability of film or digital sensor to record all at the same time. This is in contrast to our own eyesight which is able to see a very wide range of light.

For this reason, many of the dramatic light photos people try to take have sky that is completely overexposed or white and landscape that is completely underexposed or black. These images never live up to the way that the person taking the photo experienced the scene and often evoke the disclaimer, “it looked way better than this when I took it”. Since the invention of photography in the 19th century photographers have tried to compensate for this shortcoming. Traditional film photographers developed a long list of techniques, both in camera and through darkroom processing, to try to create images of high light range scenes that matched what they could see. Digital cameras and the ability to process images using computers have now given photographers the best options for dealing with this problem. It is possible to take multiple exposures of a scene in camera, exposing each image for a different part of the light range, and then combine the properly exposed portions of each into one final image. The product is a photograph that has light balance and shadow and highlight detail that more accurately expresses our vision. Photographs that would previously have been impossible are now possible, although not without some effort, skill and artistic vision.

Rowena Hills

There are automated software solutions, known as High Dynamic Range (HDR)software, that can blend multiple exposures automatically, making it possible for even the most amateur photographers to combine exposures and create high dynamic range images. The most current versions of Photoshop have HDR software built in. Other popular HDR software includes Photomatix, Nik HDR Efex Pro, and UnifiedColor HDR Expose. Currently, however, all the software solutions I have tried create quality issues for someone like myself whowants to create large fine art prints. They allow very minimal local control over the effects they create and often produce a very cartoonish or glowing look that may or may not be what is intended. Most problematic to me are the color shifts, low contrast and digital artifacts that can be introduced by HDR software. For these reasons almost all of my exposure blending is done using hand blending techniques with layer masks in Photoshop.

These techniques are an art form in their own right, taking years to master and greatly increasing the overall difficulty and level of skill required in the photographic process. The exciting part is that the creative control that darkroom masters such as Ansel Adams had, and that was largely lost in the era of color film, has now back in the hands of the photographer. Marc Adamus sums up the challenge and value of this approach eloquently on his website stating, “My process in the field today is more difficult, more complex and more creative than it ever was or could have been with film…to think about this all in the field and bring back the right exposures to fulfill my vision of the scene has taken considerably more practice than learning how to use a colored or graduated filter in the film days, and has also opened new creative avenues. Anyone who thinks of digital photography as a ‘crutch’ of sorts, simply does not understand these processes and the precision with which they must be executed in-camera as well as in processing.” Marc does such a good job communicating the ways that many contemporary photographers work that I would encourage you to read his entire artist statement if you have the time.

Deep Forest

If you are interested in learning more about the basic concepts and techniques behind exposure blending I would recommend reading my articles, Bracketing Exposures For Exposure Blending and The Basics Of Exposure Blending. I also offer classes on exposure blending as well as private instruction.

I’d love to hear your comments related to this topic. If you are an outdoor photographer, is this a technique that you use? What are your experiences with it? If you are not a photographer, what are your impressions such contemporary photography techniques? Please feel free to leave me a comment or share this article using the social media links below.

Filed Under: Photography Journal Tagged With: digital photography, Exposure Blending, photography technique

How Many Exposures To Bracket For Exposure Blending Or HDR?

September 8, 2010 by Sean Bagshaw Leave a Comment

As photographers we frequently struggle to overcome the limitations of our equipment in order to create the photographs we envision. One of the biggest limitations of traditional photography is the narrow dynamic range of light that can be contained in an image compared to what we see.

Techniques for blending exposures vary from simple to highly complex. They can be accomplished using skilled layer masking techniques in Photoshop. We also have the option to use one of a rapidly growing list of exposure blending programs commonly referred to as High Dynamic Range (HDR) software.

One of the most common questions I’m asked in classes and workshops on the topic of bracketing exposures for exposure blending and HDR imaging is, “how do you know how many exposures you need to bracket?”

The goal is to capture all the dynamic range tonal information in a scene in a series of exposures. The sequence of images below shows four exposures I took of a high dynamic range scene on the Columbia River. Having all the shadow and highlight information recorded in the various exposures allowed me to blend them using layer masks to create the final image. I could have also used one of many HDR applications to blend the exposure values.

To read the full article I wrote on the Photo Cascadia Blog go HERE.

In the first exposure I noticed that both the shadows and highlights extended beyond the ends of the histogram.
By underexposing a stop I was able to contain most of the highlights.
Underexposing two stops enabled me to retain detail in even the brightest highlights.
Finally I overexposed by two stops to get an exposure in which no shadow detail was clipped. I did take an exposure one stop over exposed but didn't end up using it in the final image.
After careful blending using layers masks I did some additional processing for color and contrast to arrive at the final image.

You can read the complete article on the PhotoCascadia.com blog.

Please leave a comment or question below.

Filed Under: Digital Image Editing Tips, Digital Photography Tips Tagged With: digital photography, Digital Photography Tips, digital workflow, Exposure Blending, HDR photography, photography technique

Doors And Windows of Guanajuato

January 21, 2010 by Sean Bagshaw 6 Comments

Doors And Windows of Guanajuato

One of my favorite photography projects in Guanajuato is exploring the callejons (narrow alleys) in search of interesting doors and windows. Many of the home owners in this town take great pride in their houses. Bright colors are popular and particular attention is paid to doors and windows. While some doors are kept carefully, other doors are neglected and have an authentic patina of time.

With a rumored two thousand callejons in the city, all lined with buildings, there is no lack of doors and windows. Every door is different. Some are pristine, with carved and crafted hardwood and hand forged metal parts. Others are weathered and full of character. Some are precariously set in crumbling stone and brick and covered with graffiti. Each one tells its own story.

As a photographer, I love the way light is reflected at different times of day in Guanajuato. The alleys are narrow enough that they transmit light in a way similar to a desert slot canyon. Direct sun striking the upper reaches of a deep alley can bounce back and forth off of the buildings, projecting a soft, radiant light deep into the shadows. A fully lit alley wall can also reflect a very strong glow onto the adjacent wall or around corners.

The light is constantly changing, so part of my challenge is to find doors and windows that have special character and then return to photograph them when they are illuminated by particularly intriguing lighting conditions.

These are just a few of the door and window photos I have taken on this visit so far. I also took a bunch last time I was here and I’ll probably photograph some more before I leave. I’m not sure what I’m going to do with all the door photos. Photographing them is mostly a compulsion. I suppose I’ll publish some of the best ones on greeting cards. I have also had requests for a “Doors of Guanajuato” poster, which I think is a pretty good idea.

If you enjoyed this photo essay consider sharing it on your social media network of choice using the handy links below.

Filed Under: Photography Journal Tagged With: fine art photography, Guanajuato, light, Mexico, photography technique, travel photography

Photo Tip: The Difference Light Makes

August 18, 2008 by Sean Bagshaw Leave a Comment

Photo Tip: The Difference Light Makes

Photography is all about light. Without it, no photo. However it goes far beyond that. The type, direction, color, amount and quality of light, as well as the photographer’s ability to see and manage the light, are serious contributors to the success of a photo. The ability to see, feel and anticipate light as well as know how the camera will capture light are skills that take a long time to acquire. Some light is right for some scenes but completely wrong for others. The best way to learn what works and what doesn’t is to get out and shoot in all lighting conditions and stick around to shoot the same subject as light is changing, all the while making special note of how the light looks to the eye.

Sometimes it is difficult to know by eye just how much impact the light going to have on a photograph. The best way to realize the impact of light is to compare photos of the same subject matter under different lighting. The following two photographs really illustrate the value of such an exercise. These photos were taken less than two minutes apart, one before the sun rose over the horizon and the second, just after. There are times when the soft glowing light that comes just before sunrise gives perfect even, luminescent lighting to a scene, picking up subtle details and working its way into the deepest shadows. However, in this case, there isn’t enough separation of elements or correctly angled surfaces in the scene. The even lighting causes the tree, rocks and mountains to appear muddy and not well defined and the sky washes out to an unattractive white.

tree 1
tree 2

What a difference a little time makes. In the second image, just a few seconds later, bright, warm, low angle direct sunlight has broken over the horizon, side lighting the scene. It brings out color and adds needed definition and depth to the image, all things the eye looks for. In addition, the direct sunlight coming in at 90 degrees to the camera lens allow for the best polarization effect from a circular polarizer, enhancing the color of the tree and rocks and helping to darken the blue sky.

The composition itself isn’t particularly interesting, but the addition of the right light can make a surprising difference in how appealing it is to the eye. This is a great example of a particular type of light enhancing an image. Unfortunately, it isn’t a perfect formula for success and you shouldn’t try to achieve the same type of lighting for every image you take. In another situation you might find that the pre sunrise light actually creates the most appealing image.

It all comes down to time spent shooting in all lighting conditions, becoming more familiar with what works and increasing your chances of being there when the light is right.

Filed Under: Digital Photography Tips, Photography Journal Tagged With: landscape photography, light, outdoor photography, photography, photography technique

Featured Photo: Grove of Shadow and Light

June 3, 2008 by Sean Bagshaw Leave a Comment

Featured Photo: Grove of Shadow and Light
redwood grove

William Neil has been working on a series for the past couple of years he calls “Impressions of Light” or something like that. He is trying to create unusual, impressionistic and intriguing visions of common outdoor photography subjects, something I’m also interested in. He uses a variety of camera techniques, one of which being slow shutter speed panning and/or zooming. A couple months back he had an amazing image in Outdoor Photographer that he took in a Yosemite redwood grove. It really struck a chord with me. This is my own attempt at something similar. It falls far short of Neil’s, but I like how the motion blur smooths out much of the distracting background forest clutter while emphasizing the lines, texture and lighting of the trees themselves. All the blur is in camera. In Photoshop I created several layers that were copies of the background image and then experimented with different combinations of blending modes (multiply, overlay, soft light) to increase color density, contrast and general mood.

Filed Under: Featured Photo Tagged With: fine art photography, Photography Prints, photography technique, Redwood Forest Photography, Redwood Trees, southern oregon photographer, southern oregon photography, William Neil

© 2026 · Sean Bagshaw Outdoor Exposure Photography